 |
This leopard was collected in Namibia by a client. It was a very large cat, it was not weighed but it was one of the largest cats I've ever worked on. It was bigger than a 165 lb leopard I did a few years ago. I had to alter the largest leopard form I could get, to make it bigger and to fit the artificial tree branch it would be perched on.
The leopard form was purchased from Research Mannikins Taxidermy Supply in Oregon. This form was sculpted by Bill Lancaster, who does great cats.

Form before alterations
Fitting the form to the artificial branch.
The branch was purchased from McKenzieTaxidermy Supply

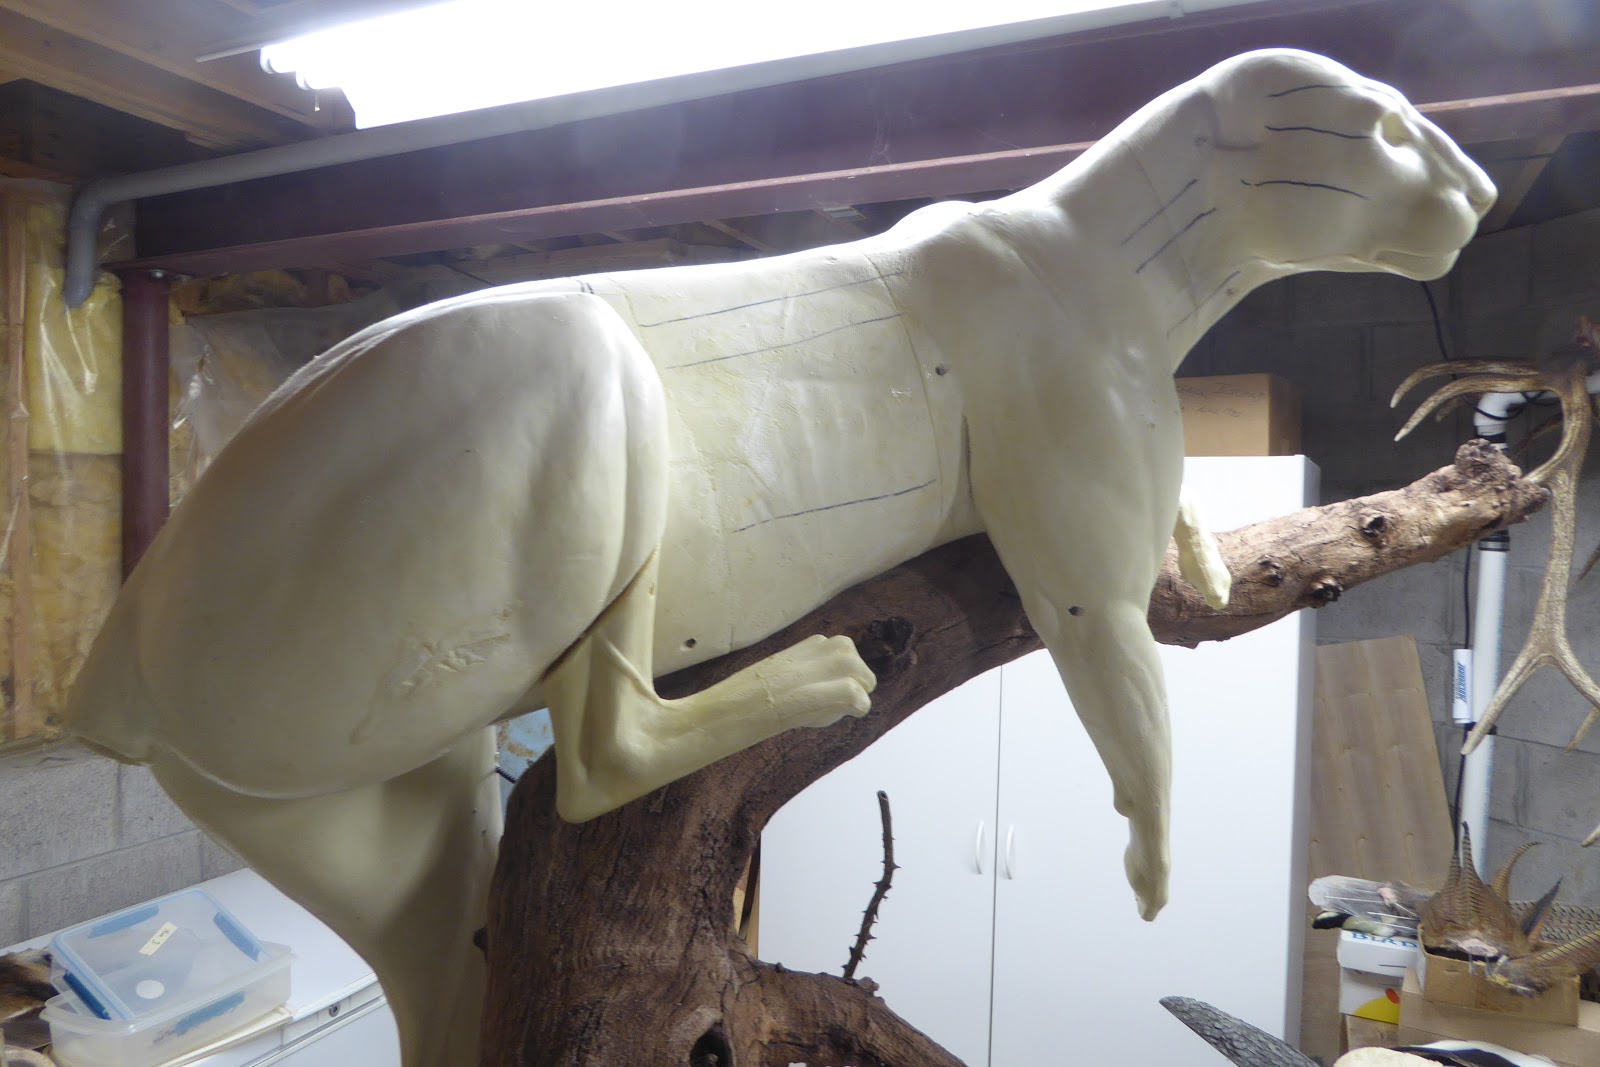
Form before hip alteration.

I had to cut the form in half to alter the angle of the hips.

Change to the hips in progress.

Adjusting foot position on the branch.

Bondo (automotive filler) is used to stabilize the foot in proper position.

Threaded rods were added to the belly for attachment to the branch.

The front shoulder was altered to the proper position and expanded to the proper size.

Again, Bondo is used to hold the pieces together.

Urethane foam is used to fill the gaps.

Foam added to expand the chest size to fit the large skin.

Foam is carved to show muscle detail.

Skin is fitted at least 5 times during the alteration process. Form is fitted to the branch.

Foam is added to the belly.

Foam is added to make the leopard's belly conform to the branch.

The head of the form was removed to create the proper angle for the finished mount.

Head adjusted to proper angle.

Front view

Elmer's Wood Putty was used to fill all of the imperfections in the mannikin. It is sanded when dry to match muscle contours.

Altered and fitted mannikin on artificial tree branch.

A flexible foam tail form was rasped to fit the skin. The tail was sewn closed at this point.

Any holes in the skin were sewn before mounting, including the tannery code punches.

A relaxed cat has it's claws retracted. I removed the claws and sewed each toe shut. Claws would not be seen in the finished mount.

Plastic ear liners and glass taxidermy eyes ready to use. The cartilage has been removed from the ears and will be replaced by the plastic liners.

Setting the glass eyes. They were purchased from Tohickon Glass Eyes.

Finished mannikin, ready to mount.
In the final display in the client's trophy room, the leopard will be staring
at the Nyala mount (done previously).

Inserting glued ear liners into the leopard skin.

Adjusting the ears.

Starting to sew front legs.

Gluing the skin and positioning the rear legs.

Gluing the back and the belly of the mannikin before sewing. I started mounting this cat early in the morning and it was late evening before I was done sewing.

The mount was positioned on the artificial branch and foot detail was done to fit the branch. Face detail was done and pinned to dry.

The mount on the finished habitat base, drying for approximately 10 days before finishing work can be done.

The whiskers were removed from the skin prior to mounting,
and now whiskers have been glued back in place.

Detail of the belly conforming to the branch.

Detail of front shoulder with skin folds and creases.

I used several reference photos of cats in this position which showed the skin folds.

Some detailed finish painting was needed on the branch.

Habitat was added to the base. A walnut base has yet to be added.

I'm not taking in as much work as I did in the past, but I have
a lot of interesting and fun projects in the shop.
No comments:
Post a Comment